
Welcome, aspiring core conqueror! You’ve landed in the right place. As your Listicle Content Architect (LCA), my mission is to distill complex fitness goals into digestible, actionable guides. Today, we’re tackling something many of you desire: a flatter stomach and a more sculpted set of abs. Forget those intimidating, multi-step workouts you see online. We’re going back to basics with beginner-friendly core exercises that will build a strong foundation and pave the way for your dream midsection.
This listicle is designed to be your roadmap. We’ll break down the essential movements, explain why they work, and guide you through proper form so you can maximize your efforts and minimize the risk of injury. Consistency is key, so even incorporating a few of these exercises into your routine a few times a week will yield noticeable results. Let’s dive in and start sculpting that powerful core!
Before you even think about crunches, you need to build a solid foundation. This is where the plank reigns supreme. It’s an isometric exercise, meaning you hold a static position, engaging multiple core muscles simultaneously. Think of it as the ultimate static hold for your entire torso. It teaches your body to maintain a neutral spine and engages your transverse abdominis, the deep muscle that acts like a natural corset.
1.1 The Classic Plank: Your Starting Point
This is your gateway into the world of core strength. Proper form is absolutely paramount here. Don’t just drop into position; focus on the details.
1.1.1 Setting Up for Success
- Starting Position: Get onto your hands and knees. Extend your legs back, resting on your forearms and toes. Your elbows should be directly beneath your shoulders.
- Body Alignment: Imagine a straight line from the crown of your head to your heels. Your hips should not be sagging towards the floor, nor should they be hitched too high in the air. Maintain a neutral spine.
- Core Engagement: This is the most crucial part. Actively squeeze your glutes and draw your belly button towards your spine. Think of pulling your navel in and up, as if you’re trying to tighten a corset. This engagement protects your lower back and maximizes abdominal activation.
- Breathing: Breathe deeply and steadily through your nose. Don’t hold your breath! Exhale as you engage your core even deeper.
- Duration: Start with what you can manage with good form, even if it’s just 15-30 seconds. Focus on quality over quantity. As you get stronger, gradually increase your hold time. Aim for 3-5 sets.
1.1.2 Common Pitfalls to Avoid
- Sagging Hips: This puts excessive strain on your lower back. Focus on keeping your core engaged to prevent your hips from dropping.
- Arching Your Back: Similar to sagging hips, this misaligns your spine and reduces the effectiveness of the exercise. Focus on a flat, neutral line.
- Shoulder Shrugs: Keep your shoulders relaxed and down away from your ears. Imagine pushing the floor away from you.
- Holding Your Breath: This will lead to fatigue faster and can increase blood pressure. Remember to breathe!
1.2 The Forearm Plank: The Go-To for Beginners
This is likely the variation you’ll start with. It’s more accessible than a high plank because your forearms provide a wider, more stable base.
1.2.1 Benefits of the Forearm Plank
The forearm plank is excellent for building foundational core strength, particularly for the transverse abdominis, obliques (side abs), and rectus abdominis (the “six-pack” muscles). It also engages your shoulders and back muscles, contributing to overall upper body stability. Because your forearms are on the ground, it often feels more stable and less demanding on the wrists compared to the high plank.
1.2.2 Progressive Overload: How to Get Stronger
- Increase Hold Time: The most straightforward way to progress. Add 5-10 seconds to your hold each week as you feel comfortable.
- Increase Number of Sets: If you’re hitting a wall with hold time, try adding an extra set.
- Add a Knee Tap: Once you can hold a forearm plank for a sustained period (e.g., 60 seconds), you can introduce a slight challenge. While in a forearm plank, alternate tapping one knee to the floor, then returning to the plank position. This adds a small dynamic element.
- Plank Jacks (Advanced Beginner): Still in a forearm plank, you can mimic a jumping jack motion with your feet, bringing them out to the sides and then back together. Keep your hips as still as possible. This is a more advanced progression.
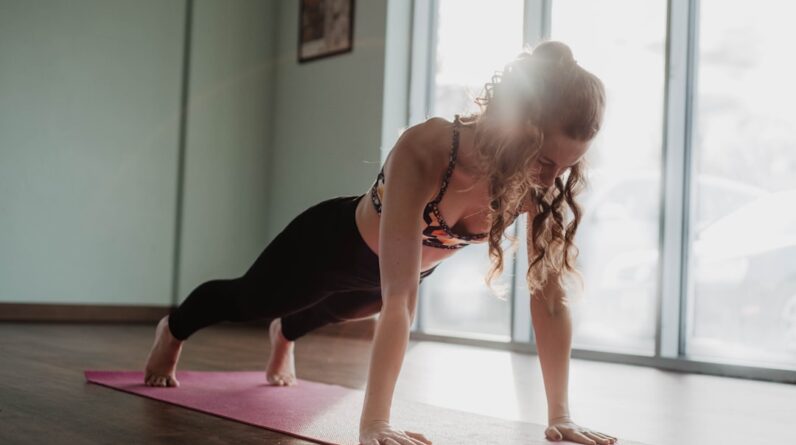
1.3 The High Plank: Stepping Up Your Game
Once you’ve mastered the forearm plank, you might be ready to tackle the high plank. This variation places more emphasis on your shoulders and arms, but still heavily engages your core.
1.3.1 The High Plank Technique
- Starting Position: Begin in a push-up position, with your hands directly beneath your shoulders and your fingers spread wide. Your body should form a straight line from head to heels.
- Core Engagement: Just like the forearm plank, actively engage your glutes and draw your belly button towards your spine.
- Neck Alignment: Keep your neck in a neutral position, looking slightly ahead of your hands. Don’t let your head drop or crane upwards.
- Progression: Similar to the forearm plank, gradually increase your hold time and the number of sets.
If you’re looking to enhance your fitness routine and achieve a flat stomach, you might find it helpful to explore beginner core exercises specifically designed for this purpose. A great resource to consider is the article titled “How to Get 6 Pack Abs,” which provides valuable insights and tips on effective workouts and nutrition strategies. You can read more about it by following this link: How to Get 6 Pack Abs. This article complements your journey towards a toned midsection by offering practical advice and exercise recommendations.
2. Engaging the Deep Core: The Hundred and Bird-Dog
While planks are fantastic for overall core stability, we need exercises that specifically target the deeper abdominal muscles and improve coordination. The Hundred and Bird-Dog are excellent choices for beginners looking to build this crucial internal support system.
2.1 The Hundred: A Classic for a Reason
This exercise, despite its name, doesn’t actually require you to hold the position for 100 breaths initially. It’s a beginner-friendly introduction to an exercise that, when performed correctly, truly targets your deep core and improves breath control.
2.1.1 Executing the Hundred
- Starting Position: Lie on your back with your knees bent and feet flat on the floor.
- Engage the Core: Gently draw your belly button towards your spine, keeping your lower back pressed lightly into the mat.
- Head and Shoulders Lift: Inhale, and as you exhale, lift your head and shoulders off the mat, curling your upper body forward just enough to engage your abdominal muscles. Your chin should be tucked slightly towards your chest.
- Arm Extension: Extend your arms long by your sides, parallel to the floor, palms facing down.
- The “Hundred” Breath: Begin to pump your arms up and down in small, controlled movements. Inhale for five pumps, exhale for five pumps. The goal is to complete 10 cycles of the five-count breath, totaling 100 pumps.
- Modification for Beginners: If lifting your head and shoulders is too challenging, keep your head and neck relaxed on the floor, but still extend your arms and begin the pumping motion. Focus on the feeling of your core engaging with each breath.
2.1.2 Benefits and Progression
The Hundred is fantastic for activating the transverse abdominis and improving diaphragmatic breathing, which is crucial for core stability and power. As you progress, aim to increase the hold time, focus on maintaining a consistent and controlled pump with your arms, and ensure your core remains engaged throughout the entire exercise. Eventually, you can work towards lifting your legs off the floor to a tabletop position (knees bent at 90 degrees) while performing the Hundred.
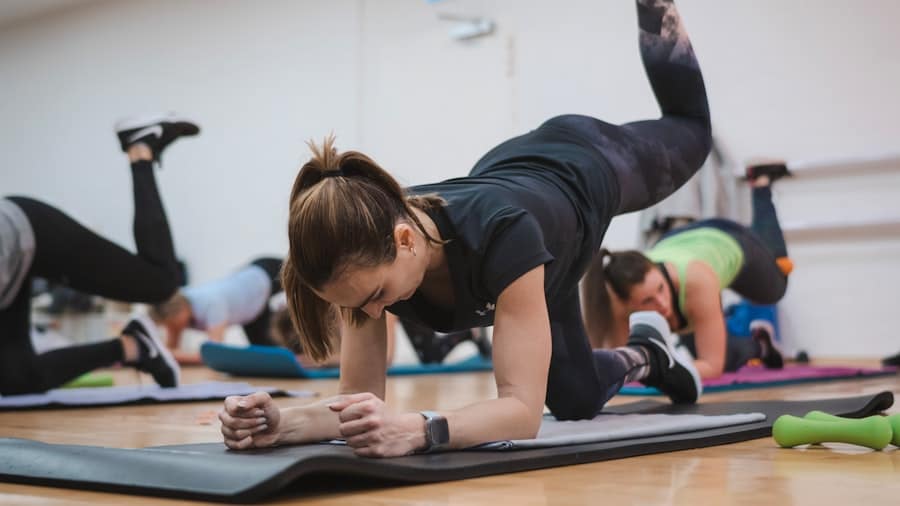
2.2 The Bird-Dog: Enhancing Stability and Balance
The Bird-Dog is a dynamic exercise that challenges your core to stabilize your spine while your limbs move. This is vital for everyday activities, from picking up objects to maintaining balance. It emphasizes anti-rotation, teaching your core to resist unwanted movement.
2.2.1 The Bird-Dog Form Guide
- Starting Position: Get down on your hands and knees, with your hands directly beneath your shoulders and your knees directly beneath your hips. Ensure your back is in a neutral, flat position – no arching or slumping.
- Core Engagement: Before you move, engage your core by drawing your belly button towards your spine. Imagine you are balancing a glass of water on your lower back.
- Arm and Leg Extension: As you exhale, slowly extend your right arm straight forward and your left leg straight back simultaneously. Keep your hips level and avoid twisting your torso. Your extended arm should be in line with your ear, and your extended leg should be parallel to the floor.
- Hold and Return: Hold for a moment, maintaining core engagement and stability. Then, as you inhale, slowly return your arm and leg to the starting position with control.
- Alternating Sides: Repeat the movement, extending your left arm and right leg on the next exhale. Continue alternating sides.
2.2.2 Why Bird-Dog is a Beginner Staple
This exercise is exceptional for building spinal stability and improving balance. It engages your deeply stabilizing core muscles, including the multifidus and erector spinae, which are essential for maintaining posture and preventing back pain. By working on opposing limbs, you’re teaching your core to work as a unit to prevent rotation.
2.2.3 Tips for Maximizing Your Bird-Dog
- Focus on Control: The slower and more controlled your movements, the more your core will be challenged.
- Minimize Hip Movement: The goal is to keep your hips as still and level as possible. If your hips are rocking side to side, you likely aren’t engaging your core sufficiently.
- Keep Your Neck Neutral: Don’t crane your neck up or let it droop. Keep it in line with your spine.
- Breathing is Key: Exhale as you extend and inhale as you return. This coordinated breathing will help you maintain core engagement.
- Start with Holds: If the full extension is too challenging initially, simply extend one limb at a time, holding the position for a few seconds before returning.
3. Working the Sides: The C-Crunch and Russian Twists
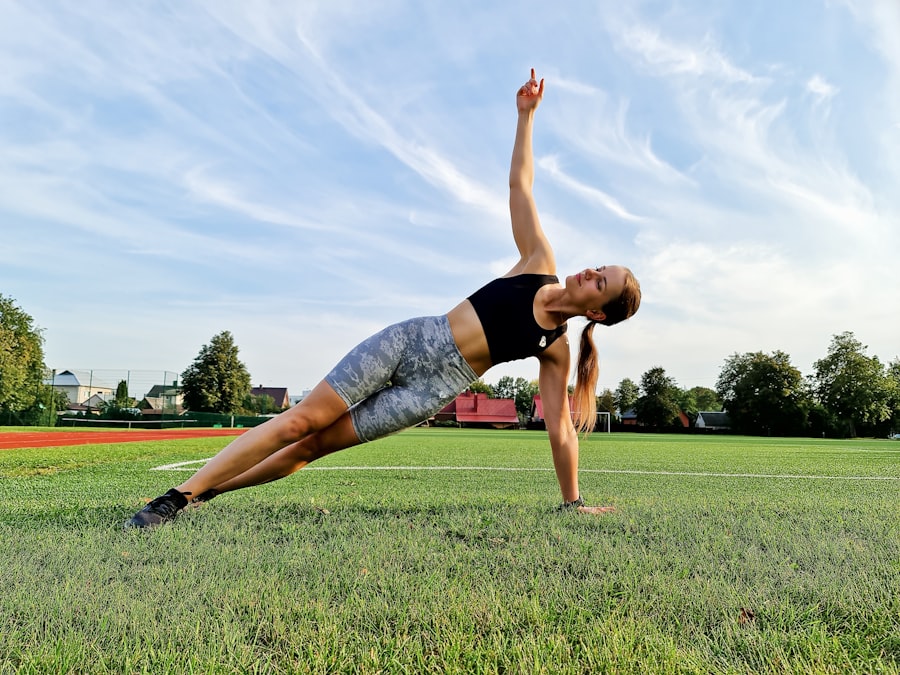
A flat stomach isn’t just about the front; it’s also about sculpting those obliques, the muscles on the sides of your waist. These muscles play a crucial role in rotational movements and overall core stability. The C-crunch and Russian twists are beginner-friendly ways to target these often-neglected areas.
3.1 The C-Crunch: A Gentle Oblique Engager
The C-crunch is a fantastic modification of a traditional crunch that places more emphasis on isolating the obliques. It’s less about a full range of motion and more about a targeted squeeze.
3.1.1 How to Perform the C-Crunch
- Starting Position: Lie on your back with your knees bent and feet flat on the floor. Place your hands gently behind your head, with your elbows pointing outwards.
- Lift and Twist: As you exhale, simultaneously lift your head and shoulders off the mat and twist your torso towards your right knee. Your left elbow will naturally move towards your right knee. Focus on squeezing your right oblique muscles.
- Controlled Descent: Inhale as you slowly and with control, lower your head and shoulders back down to the starting position.
- Alternating Sides: Exhale and repeat the movement, this time twisting towards your left knee, engaging your left oblique muscles.
- Focus on the Squeeze: The range of motion will be small. Don’t try to force your elbow to touch your knee. The key is the contraction in your side abdominal muscles.
3.1.2 Benefits of Targeted Oblique Work
By specifically targeting your obliques with exercises like the C-crunch, you contribute to a more balanced and toned midsection. This can help create the appearance of a slimmer waistline and improve your ability to turn and twist.
3.1.3 Making the C-Crunch Work for You
- Mind-Muscle Connection: Really focus on feeling the contraction in your obliques with each twist.
- Small Movements: Don’t overextend. The power is in the controlled squeeze, not the size of the movement.
- Use Your Breath: Exhale as you twist and engage, inhale as you return to the start.
- Progression: As you get stronger, you can increase the number of repetitions and sets. You can also hold the contracted position for a second or two before returning.
3.2 Russian Twists: Adding Dynamic Rotation
Once you’re comfortable with the C-crunch, you can introduce the Russian twist. This exercise adds a dynamic rotational element, further challenging your obliques and improving your core’s ability to stabilize during rotational movements.
3.2.1 Performing a Beginner Russian Twist
- Starting Position: Sit on the floor with your knees bent. You can either keep your feet flat on the floor for an easier version or lift them slightly off the ground for a greater challenge. Lean your upper body back slightly, creating a straight line from your head to your hips.
- Hands Together: Bring your hands together in front of your chest. You can also hold a light weight or dumbbell if you wish to increase intensity later.
- The Twist: Engaging your core, twist your torso from side to side, tapping your hands (or weight) on the floor next to your hip on each side. Imagine you are trying to look behind you with your torso.
- Controlled Rotation: The movement should be controlled, not jerky. Focus on rotating your torso, not just moving your arms.
3.2.2 Why Russian Twists are Effective
Russian twists are excellent for building functional core strength. They mimic movements you might perform in sports or everyday life, improving your ability to generate power through your core and stabilize your spine during rotation.
3.2.3 Progression for Russian Twists
- Increase Reps/Sets: The most straightforward progression.
- Lift Your Feet: For a more significant challenge, keep your feet elevated off the floor throughout the exercise.
- Add Weight: Hold a light dumbbell, kettlebell, or even a water bottle to increase the resistance. As you get stronger, gradually increase the weight.
- Slow Down: Perform the twists with a slower, more controlled tempo to increase time under tension.
4. Lower Abs and Core Control: The Leg Lower and Reverse Crunch
Often, the “lower abs” are perceived as a separate entity, but in reality, they are part of the same abdominal muscle group. However, specific exercises can better target these lower fibers and improve your control over the entire abdominal wall. The Leg Lower and Reverse Crunch are excellent for this.
4.1 The Leg Lower: Precision Over Power
The Leg Lower is a deceptively simple exercise that demands significant core control, especially in the lower abdominal region. It’s crucial to protect your back with proper form.
4.1.1 The Leg Lower Technique
- Starting Position: Lie on your back with your knees bent at 90 degrees, shins parallel to the floor (tabletop position). Place your hands flat on the floor by your sides, or gently under your lower back for support if needed.
- Core Engagement: Draw your belly button towards your spine. This is critical to prevent your lower back from arching. Ensure your lower back remains in contact with the floor throughout the movement.
- Controlled Descent: As you exhale, slowly and with control, lower your legs towards the floor. Move only as far as you can maintain contact between your lower back and the mat. Your legs do not need to touch the floor.
- Controlled Ascent: As you inhale, slowly and with control, bring your legs back to the tabletop position.
4.1.2 Why Leg Lowers are Effective for Lower Abs
This exercise directly engages the lower portion of your rectus abdominis. The slow, controlled lowering of the legs forces your core muscles to work harder to prevent your lower back from arching, thereby strengthening the deep stabilizing muscles as well.
4.1.3 Mastering the Leg Lower
- Lower Back is King: Your primary focus should be keeping your lower back pressed into the floor. If you feel it arching, you’ve lowered your legs too far.
- Slow and Steady Wins: The slower you go, the more your core has to work. Think about each inch of movement.
- Breathing Through It: Exhale as you lower, inhale as you return. This pattern helps with core engagement.
- Listen to Your Body: If you feel any sharp pain in your lower back, stop.
4.2 The Reverse Crunch: Flipping the Movement
The reverse crunch essentially reverses the motion of a traditional crunch, focusing on lifting the hips and pelvis off the floor, which directly engages the lower abdominal muscles more intensely.
4.2.1 Executing the Reverse Crunch
- Starting Position: Lie on your back with your knees bent at 90 degrees, shins parallel to the floor (tabletop position). Place your hands flat on the floor by your sides, palms down.
- Core Engagement: Press your lower back gently into the floor and engage your core.
- The Lift: As you exhale, contract your lower abdominal muscles and lift your hips and pelvis slightly off the floor. Imagine you are trying to bring your knees towards your chest. The movement should be small and controlled. You are not trying to perform a full sit-up.
- Controlled Descent: As you inhale, slowly and with control, lower your hips back to the starting position. Avoid letting your legs drop too quickly.
4.2.3 Benefits of Reverse Crunches
Reverse crunches are excellent for targeting the lower portion of the rectus abdominis and the transverse abdominis. They also help to improve pelvic control and stability, contributing to a stronger, more balanced core.
4.2.4 Tips for an Effective Reverse Crunch
- Focus on the Pelvic Tilt: The primary action comes from lifting your pelvis. Don’t try to use momentum from your legs.
- Small, Powerful Lift: The range of motion is small. The effectiveness comes from the intense contraction of your lower abs.
- Keep Neck Relaxed: Ensure your neck remains relaxed and in a neutral position.
- Progression: Aim for higher repetitions as you get stronger, or slowly introduce light ankle weights.
If you’re looking to enhance your fitness routine, you might find it beneficial to explore various aspects of workout gear as well. For instance, understanding the different types of t-shirt materials can significantly impact your comfort during exercises. You can read more about this in a related article that discusses which materials are most suitable for workouts. This knowledge can help you choose the right attire for your Beginner Core Exercises for a Flat Stomach and Abs. Check out the article on t-shirt materials to ensure you’re well-equipped for your fitness journey.
5. Putting It All Together: Designing Your Beginner Core Routine
| Exercise | Description | Repetitions | Sets |
|---|---|---|---|
| Plank | Hold a push-up position for a set amount of time | 30-60 seconds | 3-4 |
| Crunches | Lie on your back, knees bent, and lift your shoulders off the floor | 15-20 | 3-4 |
| Leg Raises | Lie on your back and lift your legs to a 90-degree angle | 10-15 | 3-4 |
| Russian Twists | Sit on the floor, lean back, and twist your torso from side to side | 15-20 | 3-4 |
Now that you’re familiar with these foundational exercises, it’s time to build a routine. The key to seeing results is consistency and progressive overload. Don’t overcomplicate it. Start with a few exercises and gradually increase the difficulty as you get stronger.
5.1 Sample Beginner Core Routine
This routine can be performed 2-3 times per week, with at least one rest day in between sessions. Remember to listen to your body and adjust as needed.
- Warm-up (5 minutes): Light cardio like jogging in place, arm circles, and dynamic stretches like torso twists.
- Forearm Plank: 3 sets, hold for 20-40 seconds (focus on form).
- Bird-Dog: 3 sets of 8-10 repetitions per side (slow and controlled).
- C-Crunch: 3 sets of 10-12 repetitions per side.
- Reverse Crunch: 3 sets of 10-12 repetitions.
- Cool-down (5 minutes): Gentle stretching, focusing on your back, hips, and abdominal muscles.
5.2 Progressive Overload: How to Keep Getting Stronger
To continue seeing results, you need to challenge your muscles. Here’s how you can apply progressive overload to your core workouts:
5.2.1 Increase Duration/Reps
- For Holds (Planks): Gradually increase the time you hold the plank. Aim to add 5-10 seconds each week.
- For Repetitions (Crunches, Bird-Dog, Reverse Crunches): Increase the number of repetitions per set by 1-2 each week.
5.2.2 Increase Sets
- Once you’ve reached a comfortable number of repetitions for an exercise, add an extra set. For example, move from 3 sets to 4 sets.
5.2.3 Decrease Rest Time
- Between sets, gradually decrease the amount of rest you take. Start with 60 seconds of rest and aim to reduce it to 45 seconds, then 30 seconds.
5.2.4 Introduce More Challenging Variations
- As you master the basic exercises, gradually incorporate more challenging variations. For example, progress from a forearm plank to a high plank, or introduce ankle weights to your leg lowers.
5.3 The Importance of Nutrition and Consistency
While these exercises will strengthen and tone your abdominal muscles, achieving a truly flat stomach also relies heavily on your diet. A consistent exercise routine combined with a balanced, healthy diet is the most effective path to your fitness goals. Focus on whole foods, lean protein, and plenty of water.
Remember, building a strong core is a journey, not a race. Be patient with yourself, celebrate your progress, and enjoy the feeling of increased strength and confidence that comes with a well-worked core. You’ve got this!
FAQs
What are core exercises?
Core exercises are physical activities that target the muscles in the abdomen, pelvis, lower back, and hips. These exercises help to strengthen and tone the core muscles, which can improve posture, stability, and overall body strength.
Why are core exercises important for a flat stomach and abs?
Core exercises are important for a flat stomach and abs because they help to strengthen and tone the muscles in the abdomen. This can lead to improved muscle definition and a more toned appearance in the stomach area.
What are some beginner core exercises for a flat stomach and abs?
Some beginner core exercises for a flat stomach and abs include planks, bicycle crunches, Russian twists, leg raises, and mountain climbers. These exercises can be performed at home and require little to no equipment.
How often should I do core exercises for a flat stomach and abs?
It is recommended to perform core exercises for a flat stomach and abs at least 2-3 times per week. It is important to allow for rest and recovery between workouts to prevent injury and allow the muscles to repair and grow.
Are there any precautions to consider when doing core exercises for a flat stomach and abs?
When doing core exercises for a flat stomach and abs, it is important to maintain proper form and technique to prevent injury. It is also important to listen to your body and avoid overexertion. If you have any existing medical conditions or concerns, it is recommended to consult with a healthcare professional before starting a new exercise routine.